A landscape renovation can involve much more than replacing a few plants. Depending on the condition of the property, the project may include clearing overgrown beds, changing the layout, correcting drainage, updating irrigation, installing sod, adding pavers, or creating new planting areas.
Without a clear plan, it is easy for the project to grow beyond the original budget or for the crew to complete work in the wrong order.
A successful renovation begins by identifying what is not working, deciding what should remain, and setting priorities before you select materials.
The following steps can help homeowners prepare for a landscape renovation and understand what to consider before installation begins.
1. Decide What You Want to Change
Begin by making a list of the problems you want the renovation to address.
Some homeowners want to update an outdated front yard. Others are dealing with overgrown shrubs, empty planting beds, poor drainage, worn sod, or an irrigation system that no longer matches the landscape.
Common renovation goals include:
- Opening up crowded planting beds
- Replacing unhealthy or unwanted plants
- Creating a cleaner front entrance
- Adding more usable lawn space
- Reducing difficult maintenance areas
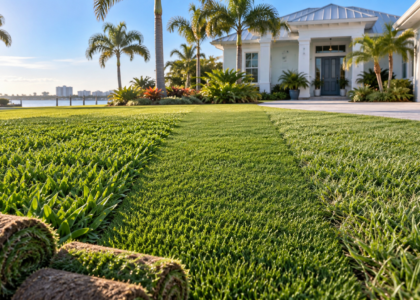
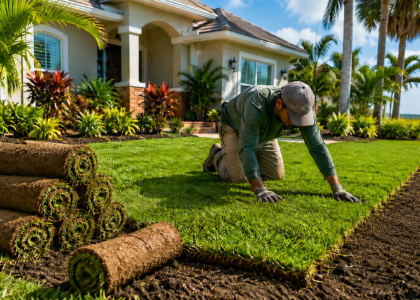
- Installing new sod
- Improving irrigation coverage
- Correcting standing water
- Adding a walkway or patio
- Updating landscape lighting
- Creating more separation between outdoor areas
Avoid beginning with a long list of plants or materials. First decide what the yard needs to do and which areas cause the most frustration.
Clear goals make it easier to build a focused plan.
2. Separate Needs From Optional Features
Most landscape renovation projects include a mix of necessary work and optional improvements.
Drainage problems, broken irrigation components, unsafe walking surfaces, and heavily overgrown areas may need attention before you consider decorative features.
Optional additions may include new lighting, expanded planting beds, decorative pavers, or a larger selection of plants.
Separate the project into three groups:
- Work that must be completed
- Work that would improve the project
- Features that can be added later
This approach helps protect the budget if the site requires more preparation than expected.
For example, a homeowner may want new sod and plants, but the property may first require grading or irrigation updates. Addressing those issues early can reduce the need to disturb newly installed landscaping later.
3. Review the Existing Landscape
A renovation does not always require removing everything.
Mature palms, trees, healthy shrubs, patios, walkways, and other features may remain part of the updated design.
Walk through the property and identify:
- Healthy plants worth keeping
- Plants that need trimming
- Plants that have outgrown their space
- Plants that repeatedly struggle
- Beds that need to be cleared
- Walkways or patios that will remain
- Areas with poor drainage
- Sections with weak irrigation coverage
- Places where the lawn is difficult to maintain
- Features that no longer fit the property
Keeping suitable plants can help the renovated landscape feel established. It can also allow the budget to focus on the areas that need the most work.
However, do not keep a plant only because it is already there. Consider its health, mature size, location, and upkeep.
4. Take Photos of the Project Area
Photos are useful during the early planning stage.
Take wide photos of the entire yard as well as closer images of problem areas. Include downspouts, low spots, irrigation equipment, walkways, fences, and areas where plants are crowded.
Good photos can help a landscaping company understand:
- The approximate project size
- The current condition of the yard
- Access to the work area
- Existing plants and structures
- Possible drainage concerns
- The amount of removal involved
- Which services may be needed
CDS Landscaping typically reviews customer photos before scheduling an onsite consultation. This allows the company to provide a preliminary idea of the project budget before completing a detailed property review.
Photos are not a replacement for an onsite evaluation, but they can help determine whether the project is likely to fit the company’s scope and minimums.
5. Create a Realistic Preliminary Budget
Landscape renovation costs depend on the size of the area, the amount of removal, plant selection, materials, preparation, drainage, irrigation, and hardscape work.
CDS Landscaping design and installation projects generally begin between $4,000 and $5,000 in labor, excluding materials. The final price depends on the complete scope of work.
Additional service minimums may apply:
- Sod installation requires at least 1,000 square feet and has a $1,500 labor minimum.
- Paver installation requires at least 100 square feet and has a $2,500 minimum.
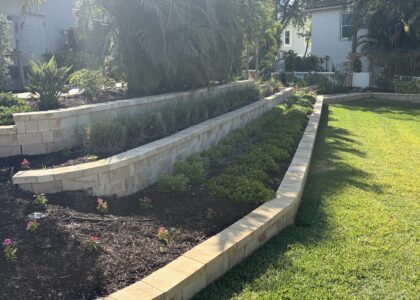
- Retaining wall projects generally have a $2,500 labor minimum.
- Drainage projects have a 50-foot minimum and a $1,800 minimum labor charge.
Fence projects are new installations only and require at least five panels. Available materials include vinyl, aluminum, and wood.
Consider these minimums when deciding which improvements to include.
It may also help to leave part of the budget available for site preparation. Removing roots, correcting the grade, replacing damaged irrigation, or handling difficult access can affect the final price.
6. Schedule an Onsite Evaluation
Once the preliminary project and budget appear to be a reasonable fit, the contractor should evaluate the property in person.
An onsite review allows the landscaping team to examine conditions that may not be visible in photos.
The evaluation may include:
- Sun and shade
- Soil condition
- Property grade
- Roof runoff
- Standing water
- Existing irrigation coverage
- Plant health
- Tree roots
- Utility equipment
- Hardscape areas
- Fence lines
- Access for equipment and materials
The homeowner should walk through the property with the contractor and explain how they use each area.
This is also the time to discuss maintenance preferences. A homeowner who wants a simple landscape may need a different plant layout than someone who enjoys regular gardening and trimming.
7. Address Drainage Before Installing New Materials
Evaluate drainage before installing plants, sod, patios, pavers, or retaining walls.
Signs of a drainage problem may include:
- Standing water
- Soft or muddy soil
- Washed-out mulch
- Bare lawn areas
- Water collecting near the house
- Runoff across walkways
- Puddles near downspouts
- Repeated erosion
A drainage solution may involve grading, catch basins, underground pipes, French drains, field drains, downspout connections, emitter drains, channel drains, or a sump pump system.
The correct option depends on where the water originates and where it can safely flow.
Installing sod or plants in a wet area without correcting the drainage may lead to continued problems. Underground work is also easier to complete before the finished landscape is installed.
8. Review the Irrigation System
An older irrigation layout may not match the renovated landscape.
Shrubs may have grown in front of sprinkler heads. Turf may have been replaced with planting beds. Some areas may receive too much water while others remain dry.
Before installation, check:
- Sprinkler head locations
- Coverage patterns
- Broken heads or valves
- Areas of overspray
- Turf and planting zones
- Sun and shade differences
- Future plant growth
- New sod areas
CDS Landscaping installs new irrigation systems and also evaluates larger repair or system renovation projects.
Plan irrigation changes before finishing sod, plants, mulch, and hardscape. This helps reduce the need to dig through finished areas later.
9. Decide What Should Be Removed
Most landscape renovations require some amount of clearing.
Removal may include:
- Overgrown shrubs
- Unhealthy plants
- Unwanted volunteer growth
- Old mulch
- Leaves and landscape debris
- Damaged sod
- Unused edging
- Selected roots
- Small landscape features that no longer fit
A landscape cleanout may be completed before the renovation begins. This can make it easier to see the grade, irrigation components, bed shapes, and usable plants.
Do not remove everything before the full plan is approved. Mature plants and existing features may still work well in the renovated landscape.
10. Develop a Practical Layout
The new layout should reflect how you use the property.
Consider the location of:
- Front entrances
- Gates
- Trash containers
- Air-conditioning equipment
- Outdoor seating
- Pet areas
- Children’s play areas
- Walkways
- Lawn equipment access
- Drainage routes
- Irrigation equipment
A walkway should follow a route people will actually use. Plants should not block windows, doors, gates, or equipment. Beds should provide enough room for mature plant growth.
The design should also create a clear relationship between lawn, planting beds, patios, walkways, and other features.
Avoid filling every open area. Leaving space between major elements can make the design easier to understand and maintain.
11. Select Plants for the Conditions
Choose plants to suit their planned location.
Important conditions include:
- Daily sunlight
- Available shade
- Soil drainage
- Irrigation coverage
- Mature plant size
- Salt exposure
- Wind
- Distance from buildings
- Distance from walkways
- Root space
A plant that performs well in one part of the property may struggle in another.
Spacing is also important. Small nursery plants can make a new bed look open at first, but they need enough room to grow. Installing too many plants can lead to crowding and frequent trimming.
A smaller group of suitable plant varieties repeated throughout the property may create a more connected design than using a different plant in every space.
12. Choose Hardscape Materials Carefully
A renovation may include paver patios, walkways, stepping stones, edging, or retaining walls.
Hardscape materials should relate to the style and colors of the home. They should also fit the intended use of the area.
Consider:
- Paver size and texture
- Color variation
- Pattern
- Walkway width
- Patio size
- Edge restraints
- Base preparation
- Drainage
- Connections to existing hardscape
- Retaining wall height
Install hardscape before plants, sod, and mulch. Excavation, cutting, base preparation, and material movement can disturb nearby landscaping.
Planning the hardscape early also helps define the final shapes of planting beds and lawn areas.
13. Plan the Correct Installation Order
The order of work can affect the efficiency of the project.
A typical landscape renovation may follow this sequence:
- Remove unwanted plants and debris
- Complete excavation and grading
- Install drainage
- Update irrigation
- Build retaining walls
- Install patios, pavers, or walkways
- Prepare planting beds
- Install plants
- Prepare and install sod
- Add landscape lighting
- Apply mulch
- Clean the work area
The exact order depends on the property and project scope.
Completing underground and structural work first reduces the chance of damaging finished landscaping.
14. Review the Final Quote Carefully
Before approving the project, review the complete scope.
The quote should explain:
- Areas included in the project
- Removal work
- Plants and materials
- Labor
- Drainage or irrigation work
- Sod square footage
- Paver square footage
- Retaining wall size
- Fence materials and panel count
- Cleanup and debris removal
- Items that are not included
Ask questions about anything that is unclear.
Changes made after materials are ordered or installation begins may affect the price and timeline. Whenever possible, make major decisions before scheduling the project.
15. Prepare for Installation
Before work begins, remove personal items from the project area.
This may include:
- Outdoor furniture
- Decorations
- Garden tools
- Children’s toys
- Portable planters
- Hoses
- Pet items
- Vehicles blocking access
Make sure the team can reach gates, side yards, water sources, and other necessary areas.
Also ask whether you should turn off irrigation and whether the crew needs access to electrical outlets.
Clear access can help the installation move more smoothly.
16. Complete a Final Walkthrough
After the crew finishes the renovation, review the property together.
The walkthrough should cover:
- Plant locations
- Watering instructions
- Irrigation settings
- New sod care
- Drain locations
- Lighting controls
- Warranty information
- Maintenance needs
- Any remaining adjustments
CDS Landscaping states that it follows up on renovation projects several times during the first six weeks to review how the installation is progressing.
Homeowners should continue watching for irrigation coverage problems, blocked drains, settling soil, or plants that need attention.
Plan Your Landscape Renovation With CDS Landscaping
A successful landscape renovation begins with a clear goal, realistic budget, full property evaluation, and proper installation order.
Plan drainage, irrigation, removal, plants, sod, and hardscape as parts of one project.
CDS Landscaping provides landscape renovation and restoration in St. Petersburg, Seminole, Largo, Pinellas Park, Clearwater, and surrounding areas.
Contact CDS Landscaping to submit photos of your project area, discuss a preliminary budget, and schedule an onsite evaluation.