Planning a new landscape can feel overwhelming when several parts of the yard need attention. Homeowners may be thinking about plants, sod, irrigation, drainage, walkways, lighting, and other features at the same time.
A clear process helps turn those ideas into a practical plan. It also helps identify which work should happen first, which materials the project needs, and whether the proposed design fits the property and budget.
The landscape design and installation process can vary based on the size and condition of the yard. A small planting project may be fairly direct. A larger renovation involving drainage, irrigation, sod, pavers, or retaining walls will require more preparation.
Here is what homeowners can generally expect when planning a landscape design and installation project with CDS Landscaping.
Step 1: Share Basic Information About the Project
The process begins with a general description of the property and the work you have in mind.
Homeowners should explain which areas they want to update and what problems they are trying to solve. It is also helpful to describe how they currently use the outdoor space.
The initial information may include:
- The location of the project
- The approximate size of the work area
- The current condition of the yard
- Photos of the areas that need attention
- Features the homeowner wants to keep
- Plants or materials they prefer
- Drainage or irrigation concerns
- The intended use of the space
- A general project budget
Photos can help CDS Landscaping understand the basic scope before scheduling an onsite meeting. They may also help determine whether the project is likely to fit the company’s service minimums.
This early discussion is not a final design or quote. It is a practical first step that helps both sides decide whether to move forward with a property visit.
Step 2: Discuss the Preliminary Budget
Landscape projects can vary widely in cost based on the size of the area, plant selection, materials, preparation work, and services involved.
Before detailed planning begins, CDS Landscaping may provide a general budget range based on the photos and information supplied by the homeowner.
This helps prevent the design from moving in a direction that does not fit the available budget.
The company’s design and installation landscaping projects generally start between $4,000 and $5,000 in labor, excluding materials. Larger projects may cost more depending on the work involved.
Additional minimums may apply when the project includes specific services:
- Sod projects require at least 1,000 square feet and have a $1,500 labor minimum.
- Paver projects require at least 100 square feet and have a $2,500 minimum.
- Retaining wall projects generally have a $2,500 labor minimum.
Fence projects are new installations only and require a minimum of five panels. Available materials include vinyl, aluminum, and wood.
Understanding these minimums early can help homeowners decide which parts of the project to include.
Step 3: Complete an Onsite Property Review
If the preliminary scope and budget are a reasonable fit, the next step is an onsite meeting.
This visit allows the landscaping team to see conditions that may not be clear in photos. The property review may include sunlight, shade, soil, existing plants, grading, irrigation, drainage, access, and available planting space.
The team may also look at:
- Roof runoff and downspouts
- Low or wet areas
- Existing sprinkler coverage
- Tree roots
- Utility equipment
- Walkways and gates
- Patios and other hardscape
- Property boundaries
- Existing fences
- Areas of heavy foot traffic
- Access for equipment and materials
The onsite review helps identify whether the homeowner’s original ideas are practical for the property.
For example, a planting bed may need to be adjusted because of limited sunlight. A proposed patio may affect drainage. New sod may require irrigation changes before installation.
The goal is to understand the entire area before the team orders materials or begins work.
Step 4: Identify What Should Stay or Be Removed
Many design projects begin with an existing landscape rather than an empty yard.
Some trees, palms, shrubs, irrigation components, walkways, or hardscape features may remain. Other elements may be overgrown, unhealthy, poorly placed, or no longer useful.
The property review helps separate the landscape into three basic groups:
- Features that should remain
- Features that can be trimmed or updated
- Features that should be removed or replaced
Keeping healthy and suitable plants can help the new landscape feel established. However, retaining every existing plant may limit the design or create continued maintenance problems.
A shrub that repeatedly grows over a walkway may be too large for the location. A plant that struggles every season may not fit the amount of sunlight or moisture in that bed.
Base this decision on plant condition, mature size, location, and how you plan to use the updated area.
Step 5: Develop a Site-Specific Layout
Once the team has reviewed the property, CDS Landscaping can develop a basic visual plan and material layout for the site.
The company builds each project around the actual yard. Instead of relying on one standard layout, the team determines plant spacing and feature placement onsite to fit the available area.
The layout may show or explain:
- Planting bed shapes
- Plant groupings
- Approximate plant locations
- Sod areas
- Walkways or paver areas
- Drainage components
- Irrigation changes
- Landscape lighting locations
- Retaining walls
- Fence lines
- Mulch or decorative material
The amount of design detail depends on the size and complexity of the project.
A straightforward planting project may only need a simple onsite layout and material list. A project involving several services will require more planning to determine the installation order.
The homeowner should review the proposed layout and ask questions before approving the work.
Step 6: Select Plants and Materials
Plant and material choices affect the appearance, cost, maintenance, and installation requirements of the project.
Choose plants based on more than color. The plan should also consider:
- Daily sunlight
- Soil drainage
- Mature plant size
- Available root space
- Irrigation coverage
- Distance from structures
- Maintenance needs
- Salt exposure in coastal areas
- Compatibility with nearby plants
A small nursery plant may become much larger over time. Proper spacing helps reduce crowding and repeated heavy trimming.
Hardscape materials should also fit the property. Paver colors, retaining wall blocks, edging, and decorative materials should relate to the home and surrounding landscape.
The final material list gives the homeowner a clearer understanding of what the team will install and helps CDS Landscaping prepare the detailed quote.
Step 7: Review the Final Scope and Quote
After the onsite assessment and material planning are complete, CDS Landscaping can prepare a more exact project quote.
The quote should reflect the approved scope, labor, materials, and site preparation.
Homeowners should review:
- Which areas are included
- Which plants or features will be removed
- Which existing features will remain
- Plant and material selections
- Drainage or irrigation work
- Sod or paver square footage
- Fence materials and panel count
- Retaining wall size
- Debris removal
- Estimated project order
- Items that are not included
Making decisions before installation begins can reduce confusion during the project.
However, changes after the team orders materials or starts work may affect the price and schedule. Discuss any requested change before the team proceeds.
Step 8: Prepare the Work Area
Preparation is an important part of landscape installation.
The work may begin with removing plants, debris, old mulch, unwanted sod, or existing materials. Some projects require excavation or grading before the team installs anything new.
Preparation may include:
- Trimming and removing plants
- Clearing landscape beds
- Removing old mulch
- Excavating paver or wall areas
- Adjusting the grade
- Preparing drainage routes
- Locating irrigation components
- Removing damaged sod
- Marking bed and walkway locations
- Creating access for materials
The amount of preparation depends on the condition of the property.
An overgrown yard may require a larger cleanout before the team can install the new design. A property with standing water may need drainage work before the team adds new sod or plants.
Step 9: Complete Drainage and Irrigation Work First
The team usually handles drainage and irrigation before completing the visible parts of the landscape.
This order helps avoid digging through new sod, planting beds, or pavers later.
Drainage work may include:
- Grade correction
- Catch basins
- Underground drainage pipes
- Downspout connections
- French drains
- Emitter drains
- Channel drains
- Pump systems
- Retaining wall drainage
The correct solution depends on where water originates, where it collects, and where it can safely go.
Irrigation work may include installing a new system, revising zones, moving sprinkler heads, or updating coverage to match the new planting layout.
Plant beds and turf should not automatically share the same watering pattern. The system should account for sunlight, plant needs, turf areas, and future plant growth.
Step 10: Install Hardscape Features
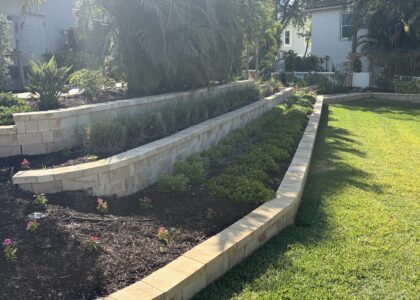
If your project includes pavers, retaining walls, edging, or stepping stones, the team generally installs them before plants, sod, and mulch.
Hardscape work may involve excavation, base preparation, compaction, drainage, cutting, and edge restraint.
Completing this work first helps define the structure of the landscape.
A paver walkway may establish the route through the yard. A retaining wall may create different planting levels. Edging may determine the final shape of landscape beds.
The team can then install plants around these completed features.
Step 11: Install Plants and Sod
Once the structural and underground work is complete, the planting phase can begin.
The team places plants according to the approved onsite layout. Spacing should account for mature size rather than only the size of the plants on installation day.
The installation process may include:
- Preparing planting areas
- Positioning plants for review
- Digging planting holes
- Adding soil amendments when appropriate
- Installing plants at the correct depth
- Hand watering new plants
- Connecting or adjusting irrigation
- Applying mulch
CDS Landscaping provides a 45-day warranty on plant materials. Homeowners should follow the recommended watering and care instructions during this period.
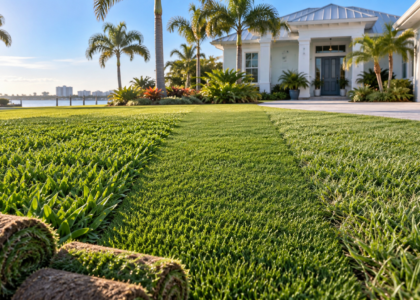
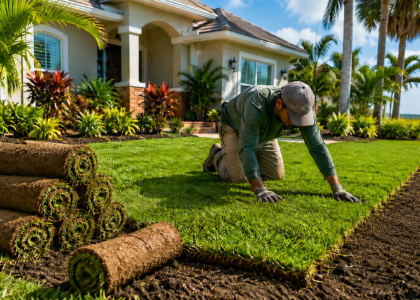
When the project includes sod, the team prepares the soil and grade before installing the turf. The team also tests irrigation coverage so the new sod can receive consistent water.
Step 12: Add Lighting and Finishing Details
The team generally installs landscape lighting after establishing the main layout.
Fixtures can light walkways, near selected plants, around patios, or beside other landscape features. The lighting plan should consider fixture location, wiring routes, visibility, and how you will use the area after dark.
The final work may also include:
- Applying mulch
- Cleaning hardscape surfaces
- Adjusting bed edges
- Removing leftover material
- Clearing debris
- Testing irrigation
- Testing drainage components
- Making minor plant adjustments
The goal is to leave the project area clean and ready for the final walkthrough.
Step 13: Complete the Final Walkthrough
After installation, the homeowner and CDS Landscaping should review the completed work together.
The walkthrough provides an opportunity to confirm the project scope and explain how to care for the new landscape.
Topics may include:
- Plant watering
- Irrigation timer settings
- New sod care
- Drain locations
- Lighting controls
- Plant warranty information
- Areas that may settle
- Recommended maintenance
The homeowner should ask about any part of the project they do not understand.
This final review also allows CDS Landscaping to identify any minor adjustments before completing the project.
How Long Does Landscape Installation Take?
The installation timeline depends on the size and complexity of the project.
A plant-focused update may require less time than a project involving drainage, irrigation, pavers, retaining walls, fencing, and sod.
Weather, material availability, site access, permitting, and changes to the approved scope can also affect timing.
Discuss the project schedule after the team completes the property evaluation and final material list. A general timeline based only on photos may change after the team inspects the site.
Plan Your Landscape Project With CDS Landscaping
The landscape design and installation process begins with understanding the property, the homeowner’s goals, and the available budget.
From there, CDS Landscaping can evaluate the site, plan materials, develop a practical layout, and complete the work in an order that accounts for drainage, irrigation, hardscape, plants, and sod.
CDS Landscaping serves St. Petersburg, Seminole, Largo, Pinellas Park, Clearwater, and surrounding areas.
Contact CDS Landscaping to share photos of your property, discuss your preliminary budget, and determine whether an onsite landscape consultation is the right next step.